Showing posts with label diy. Show all posts

Tuesday, March 1, 2011

diy {chicken wire frame & memory card clips} ( from ashleyannphotography.com/blog)


diy {chicken wire frame & memory card clips}

Thank you for all the sweet comments about my niece. It has been 4 days since I last saw her (granted I have been out of town for 3 days). I miss her. I have some pictures of her and her daddy that are a little different than what I normally do. I am working on a post for them next week, maybe Monday….
I’m still working on details in the playroom. One thing I wanted to include was a spot to display pictures and artwork by the kids. Several years ago I bought a gold mirror from Garden Ridge and painted it black for our living room. It hasn’t been used in a long time so I decided to take the mirror out and give the frame a new life.
After removing the mirror, I painted the frame a bright yellow. Then I stapled chicken wire to the back side of the frame. When I bought the chicken wire from Atwoods the man working that department asked if I needed any pointers for my chicken coop. I told him I was making a frame for artwork. He shook his head and walked away.
To hold pictures to the chicken wire I hot glued small clothes pins to the back of some of my Charlie Harper memory cards. I let the boys pick out their favorite cards to use.
Super easy, super affordable and I think it is pretty practical and cute!

Monday, February 28, 2011

Men's Button-Up Refashion... into Ladies Tank!

Cushion Couch

Teen Sewing & Craft Projects

Project provided courtesy of: Jo-Ann Stores  ©

Cushion Couch

Teen couch from JoAnn @ www.joann.comTake a break on something you make! Choose a cool pattern and really accent the room with your design taste.

Supplies

For one 4" thick cushion:
  • 22" X 22"X 4" NU-Foam cushion (or foam)
  • 1-1/3 yd 45" home dec fabric
  • 2/3 yd contrasting print for side bands
  • 1/2 Yd contrasting solid for cording
  • 5 1/3 Yd 3/4" cording
For one 8" thick cushion:
  • Two 22" X 22" X 4" NU-Foam cushion (or foam)
  • 1-1/3 yd 45" home dec fabric
  • 1-1/8 yd contrasting print for side bands
  • 1/2 yd contrasting solid for cording
  • 5 1/3 Yd 3/4" cording
For both sizes:
  • 8 Buttons
  • Heavy duty thread
  • Basic sewing supplies
  • Directions (1/2" seam allowances)
1. For 4" & 8" thick cushion: Cut 2 squares 23" x 23" for top & bottom of cushions.
2. For 4" thick cushion cut 4 strips 23" X 5" of contrasting print for sides.
3. For 8" thick cushion cut 4 strips 23" x 9" of contrasting print for sides.
4. Cut 5-1/3 yards X 3" strips of solid for cording.
5. Make cording.
6. Sew cording around each square.
7. Sew 5" ends of all four sides strips together - leaving 1/2" open at the top and bottom of each seam.
8. Sew side band section to one square - matching corners.
9. Sew to other square - leaving one side open turn right side out and insert cushion. Slipstitch closed.
10. Sew buttons on through cushion matching buttons on top with buttons underneath. Pull tight to "tuft".
Approximate Crafting Time: Three hours per cushion
Skill Level: Some sewing experience needed.
Due to seasonal nature of project, supplies are available for a limited time only. Please read all instructions prior to beginning; read and follow all manufacturers' instructions for all tools and materials used. Provide adult supervision if children participate in this and all craft projects. Because Jo-Ann Stores, Inc. and Joann.com have no control over the use of materials and tools, nor surroundings, during construction of projects, Jo-Ann Stores, Inc. and Joann.com disclaim any liability for injury, damage or other untoward results. Content of this project sheet is presented in good faith, but no warranty is given, nor results guaranteed. ©2005 Jo-Ann Stores, Inc. All rights reserved.
2/07

Sunday, February 27, 2011

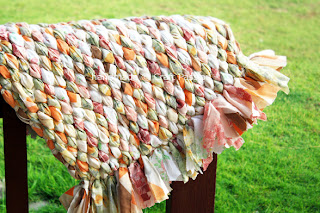
woven rag rug

upcyclign ideas

lined canvas bins