Monday, February 28, 2011

Grateful Mod Thanksgiving (from hostessblog.com)

Modern Thanksgiving Table Ideas
This Modern Thanksgiving Table was inspired by – and utilizes – the “Grateful Mod” printable party collection that I designed for Operation Give ThanksYou can download the printables for free and get more info on this wonderful effort from Operation Shower in my earlier post right here.
I really had fun working on this table – especially with the centerpiece, which was inspired by the little tree illustrations on the printables! (I’ll post a separate DIY tutorial on the tree on Friday 11/12.)
I hope this inspires you to bring a dose of mod to Thanksgiving this year in honor of Operation Give Thanks!Lots more pics below… and stay tuned for Part 2, which will feature a 2nd DIY centerpiece idea + coordinating party favors & desserts.
Modern Thanksgiving Table Ideas
P.S. Here’s the link to where you can download the party printables again.  (I just printed these out at Fedex Kinkos on their standard 80# laser stock!)

T-shirt bags ( from notthejetset.net)

reuse it! : t-shirt bags

Welcome Stumble Readers! To find out more about Not the Jet Set, click here. We are apersonal finance blog focused on frugalitystewardship, and current events, while also telling our story as a family and the personal finance decisions we have made. Thanks for stopping by and be sure to check out our NtJS Cafepress shop!
Also don't miss the other posts in this series: ReUse It!
I'm sure that I'm not the only one who has heard the grim statistics about plastic bags. What can we do to cut back on the 500 billion to 1 trillion plastic bags consumed world wide each year? Keep your own reusable t-shirt bag with you every time you shop! When you think that it's only one plastic bag stop and think. If you use an average of 6 bags per week it adds up. That is 288 bags per year!

As promised, Here is the information to make your own Reusable T-shirt Bag. If you are looking for an easy, weekend project, then we've got you covered.

Cost: Nothing if you have an old t-shirt and a spool of thread. I bought some t-shirts at a garage sale for a quarter each so that is my project cost.

Time: 10 minutes first time, less then 5 minutes after the first one

Skill Level: Beginner

Materials needed:

  • 1 t-shirt any size
  • scissors
  • sewing machine
  • thread
  • 9" pie pan or 9" circle
  • fabric pencil or chalk

Instructions:

1. Mark- Lay your t-shirt on a flat surface. Take your pie pan or template and lay it over your collar so that it is a half circle on the shirt. Mark the shirt for the bag opening.

2. Cut- Cut out the neckline according to your markings. Then cut out the sleeves just inside the seam line.

3. Pin- Turn your shirt inside out and pin the bottom opening closed.

4. Sew- Sew the bottom edge that where you pinned.

5. Done- Turn your shirt right side out and enjoy your new bag!

Overall Project Grade: A (it doesn't get any easier than this!)

Project Notes: As you can see from the photo some shirts work better then others. I found that the fitted style t-shirts work better then the unfitted. I also found that the smalls work the best. The white one in the photo is a large but I found that unfitted mediums seem to work well also.

This is a super fast and fun project. I love to use novelty t-shirts and college shirts. By using those types of shirts I can make them patch their new owner's personality so that they will be used and not tucked away in the back of a closet!

Simple Backpack (from allaboutyou.com)

Sew a simple backpack

Prima online 16.04.2009

Stow all your stuff in a mini rucksack

 sew simple backpackCut pieces of cotton fabric as per diagram, below. Measurements are in cm, 1cm seam allowances included.

Pin and stitch flaps together, curving stitching at lower edge, and trim. Turn right side out and press. Topstitch close to edge and again 6mm away.

Press down 1cm on to wrong side on long edges of loop and straps. Fold in half lengthwise and stitch edges.

3 Pin and stitch bag at side edges, leaving a 3cm gap in stitching 5cm below top edge. Neaten seam allowances and press open. Press under 1cm then 4cm around top edge of bag and stitch. Tack straps 13cm apart just below casing stitching. Tack ends of loop in between. With raw edges level, stitch open edge of flap on top of straps. Press flap upwards and stitch close to seam and again 1cm away. Tack other end of straps to base of bag, 18cm apart. Cut 2m of chunky cord in half and thread through casing from each side. Knot ends.

4 Stitch base to bottom of bag, trimming ends of base into curves to fit bag. Neaten seam allowances.
Cotton fabric from Cath Kidston (0845 026 2440). 

sew simple backpack diagrams

mothers day flower pins (from notmartha.org)

[dahlia corsages in reds, pinks and yellow]

hooded bath towels from makeandtakes.com

Easy Hooded Bath Towel

by MARIE on MARCH 31, 2009
I make each of my kids their own bath towel hoodie when they’re born, starting with my son 6 years ago. I make them one with their name on it and one with a fun appliqued shape on the back. These towels are super easy to make, needing only limited sewing know-how. And they make for great birthday or baby shower presents for others.
Bath Towel Hoody
Supplies for Bath Towel Hoodies:
  • one large bath towel – any color
  • one hand towel – any color
  • fabric for letters – can be anything. I use fleece and it does pill, but I don’t mind as it doesn’t fray.
  • scissors, pins, sewing machine
  • extras: ric-rac, double bias tape
hoody-supplies
First, cut your hand towel in half horizontally. Then lay out your large bath towel on the floor and center one of the cut pieces of hand towel on top of the towel. Put the cut side up, so that the sewn end in the one being sewn to the large bath towel, then you don’t have to fold over the edge.
hoody-cut-half
Updated: You only need one half of the hand towel to make one hooded bath towel. I usually buy 1 hand towel and 2 bath towels, and it gives me two hooded bath towels.hoody-cut-side-up
Pin the cut hand towel to the large towel and sew in place. It doesn’t really matter how you sew them together, I actually like to sew them on top of each other, not right sides together. But either is fine.
hoody-ends-on-tophoody-pinned
Fold your hood together in half, pairing the cut side together. Sew this together. I don’t mind that the seams show and will fray a little after washing, this is the part that is on the inside and their heads cover that.
hoody-pin-hoodhoody-inside
You could be done here, but I like to add a few extras, a name or a shape to the back that I applique to the towel. I’m no expert and not a perfectionist, so most times the applique comes out a little wonky! I cut out letters/shape from fabric, pin them on, sew around each with a zig-zag stitch and call it good!
hoody-flower
I’ve also added some double-bias tape to my newest baby’s towel, down the sides and on the hood.
Hooded Bath Towel
Baby Hooded Bath Towel
Have fun making your kids some new towels. I’m actually thinking I should make one for me!!

Potentilla Bib Necklace ( taken from flamingotoes.com)


Anthro Necklace Week – Potentilla Bib

Day Two of Anthro Necklace Week!
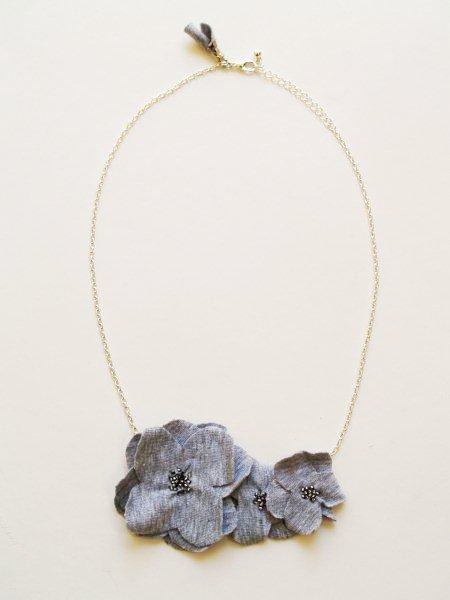
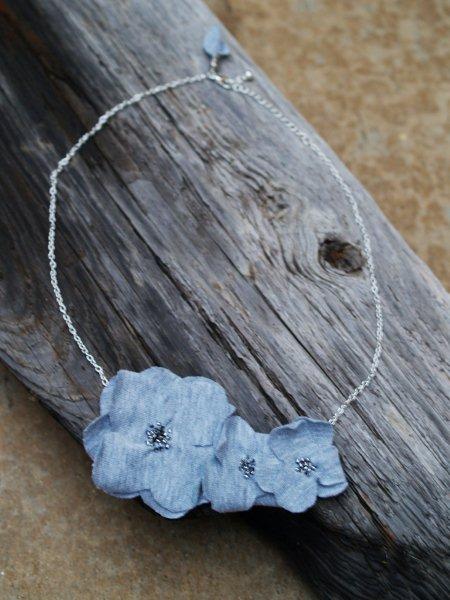
Today we’re doing the Potentilla Bib Necklace – which I just love.
I don’t get the price though. (I usually don’t.) It’s $138.00 for this little gem. Is it because it’s made in France?? I have no idea.
Here’s the Made in Carlsbad version:
And here’s the French Anthro Version. Oui oui.
 This is really one of my favorites for the week.
Here’s how to make your very own, inexpensive, Non-French, knockoff.
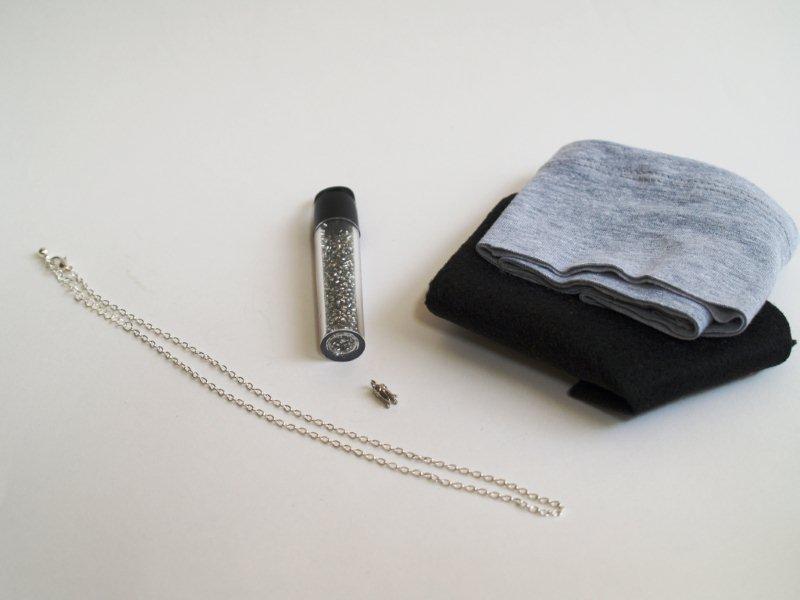
Materials:
  • Scissors
  • Needle & Thread
  • Needle Nose Pliers
  • Wire Cutters
Supplies:
  • 1 18″ Silver Chain Necklace (Or supplies to make your own) 
  • Knit fabric (just scraps)
  • Seed Beads
  • Cone or Small Ribbon Clamp
  • 3 Jump Rings (Silver)
  • Felt scrap
 
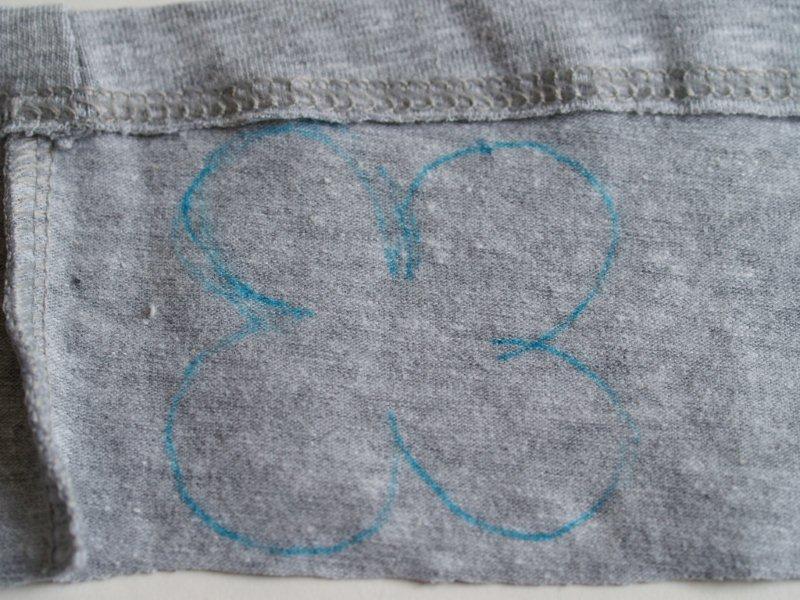
The first step is to make the flowers. For my flowers I used the end of a T-shirt that I was needing to shorten.
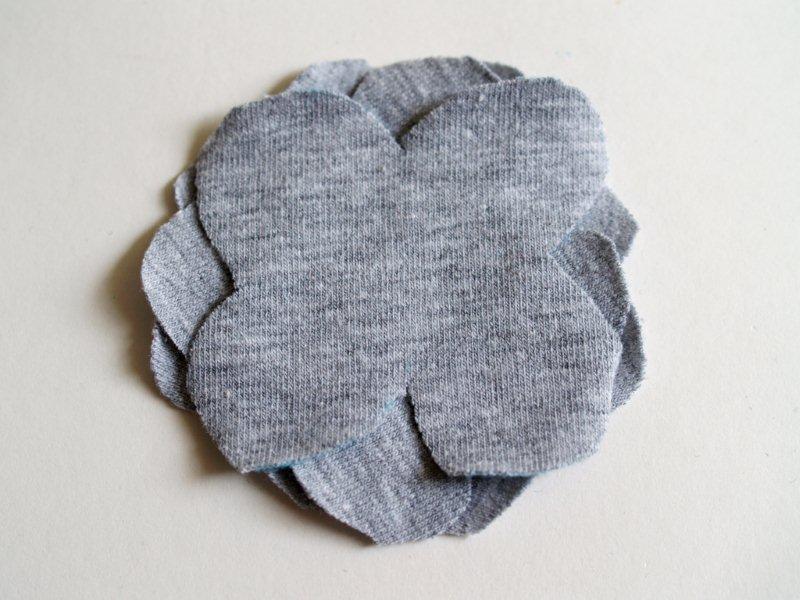
Trace a small 4 leaf flower onto the fabric.
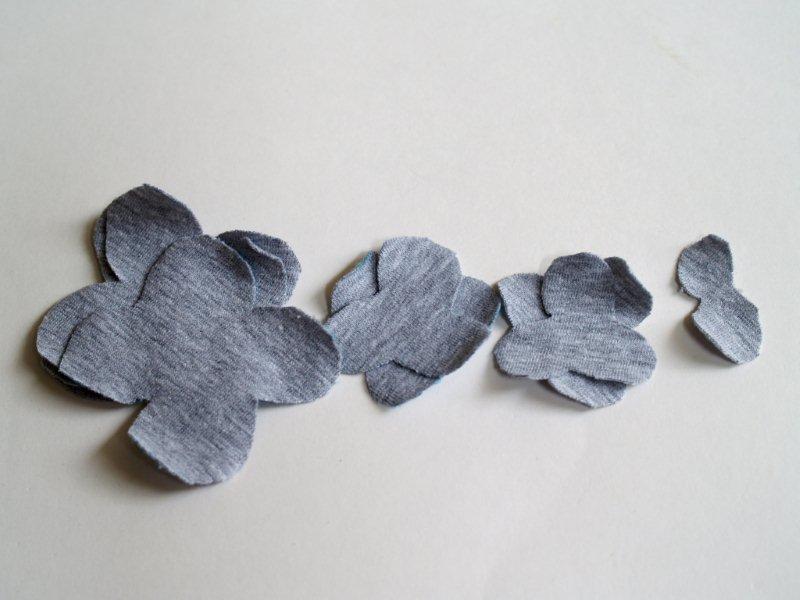
Cut out four flowers this size. Repeat this process making a smaller 3 leaf flower, cut out 4. Then cut out one 2 leaf piece, with one leaf smaller than the other.
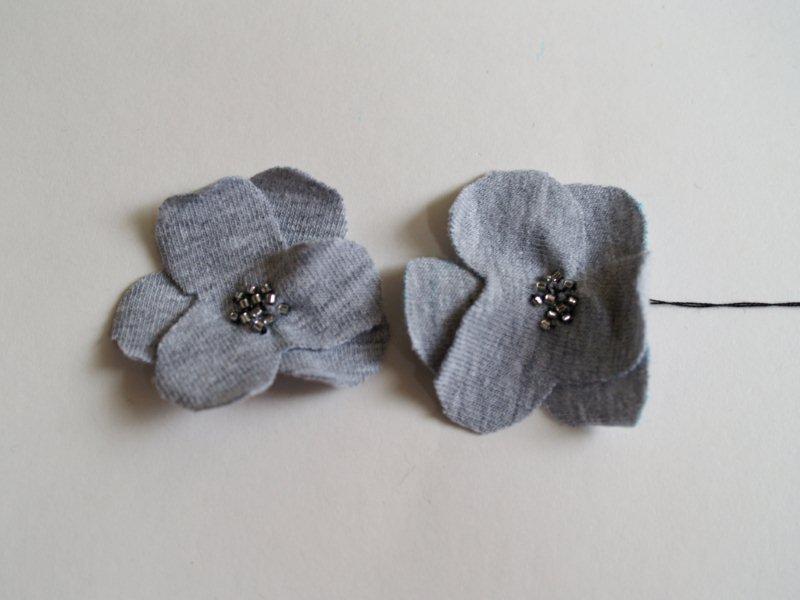
For your largest flower, layer the 4 large pieces on top of each other, rotating them just a bit so the different petals show through.
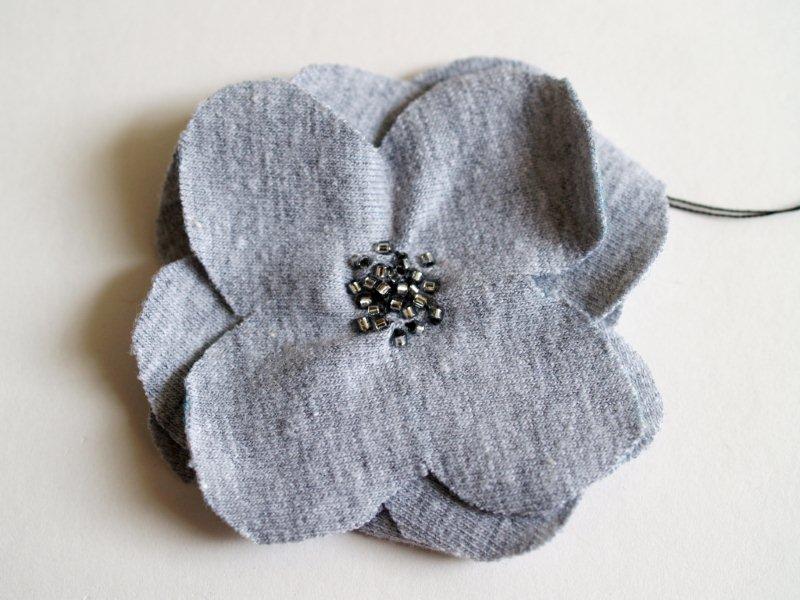
Sew a grouping of seed beads in the center of your flower. At the same time, do a couple of small stitches in the center that gather the flower just a bit.
Repeat this process for one of the smaller flowers. Stack them so that the petals are rotated and sew on the seed beads.
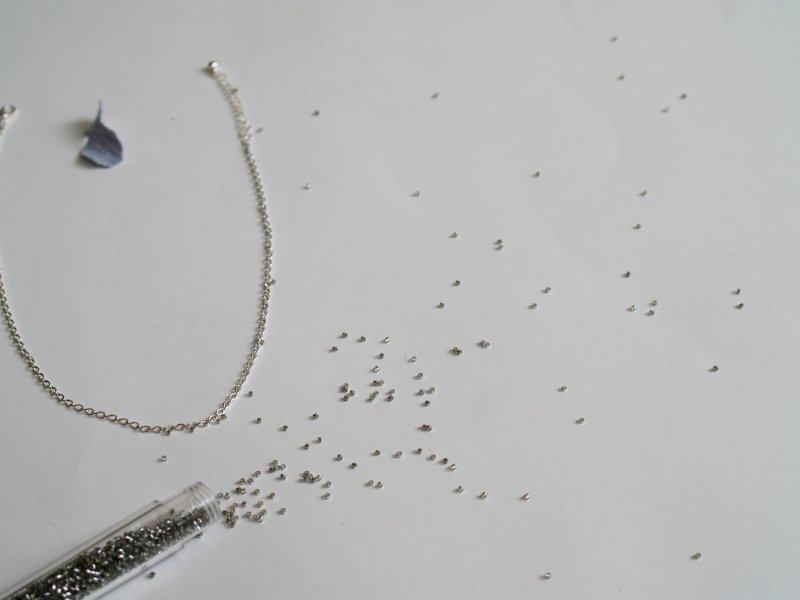
Take a minute to say some fake swear words because you knocked over the bottle of seed beads.
Sigh.
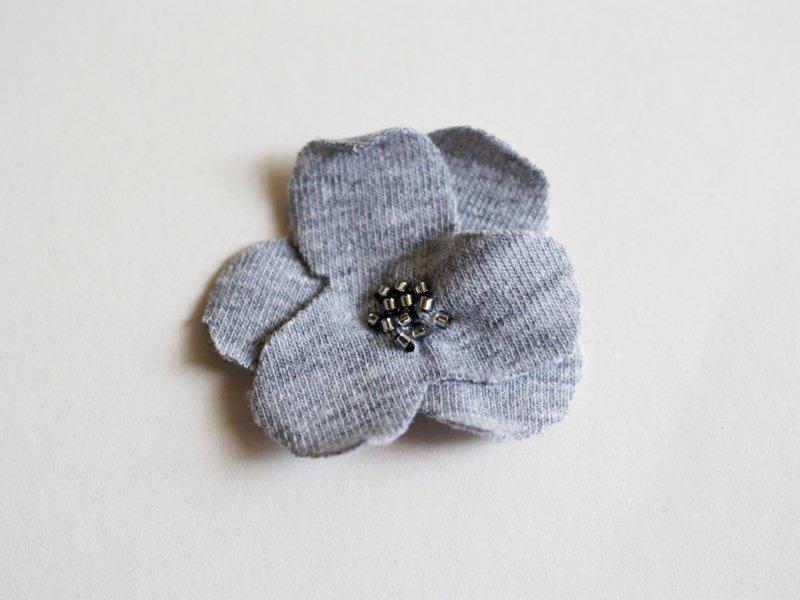
Repeat the process – minus the mess - with the third flower.
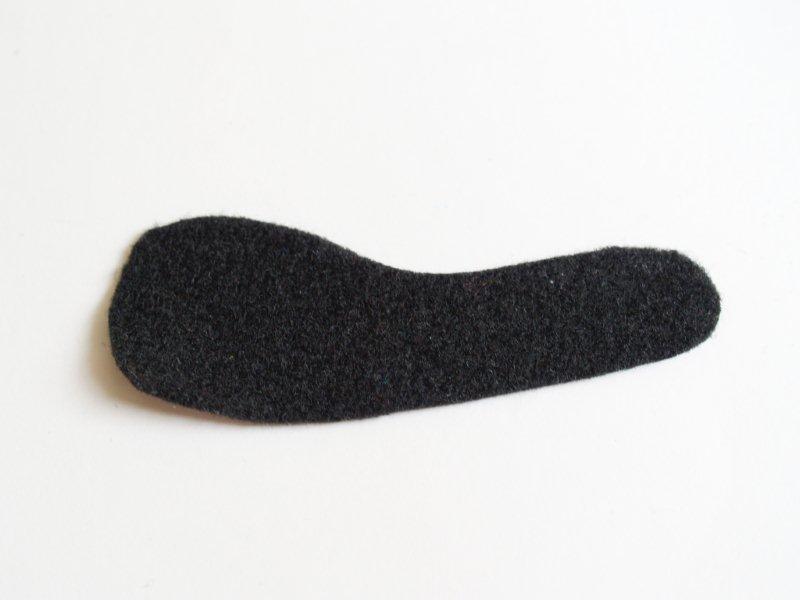
From your felt scrap cut a small shape to sew your flowers too.  It should be a little larger on one side for the larger flower, but it should be able to be completely covered by the flowers.
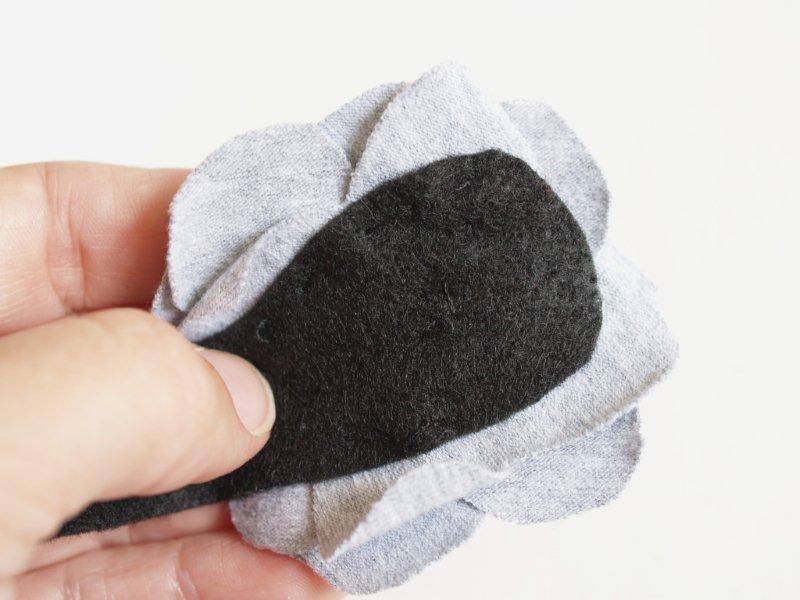
Start with the large flower and sew it to the left side of the felt shape.
Make sure you don’t sew all the way through to the front of the flower, or that your stitches show on any of the petals.
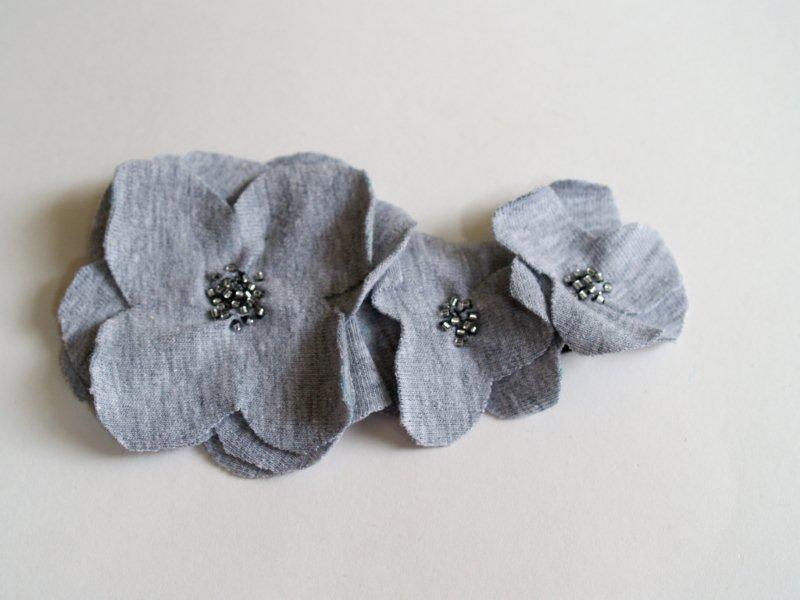
Sew on your two smaller flowers. Overlap them just a bit.
Optional: If your knit is a bit curly, take a little fabric glue and glue down just a few of the petals.
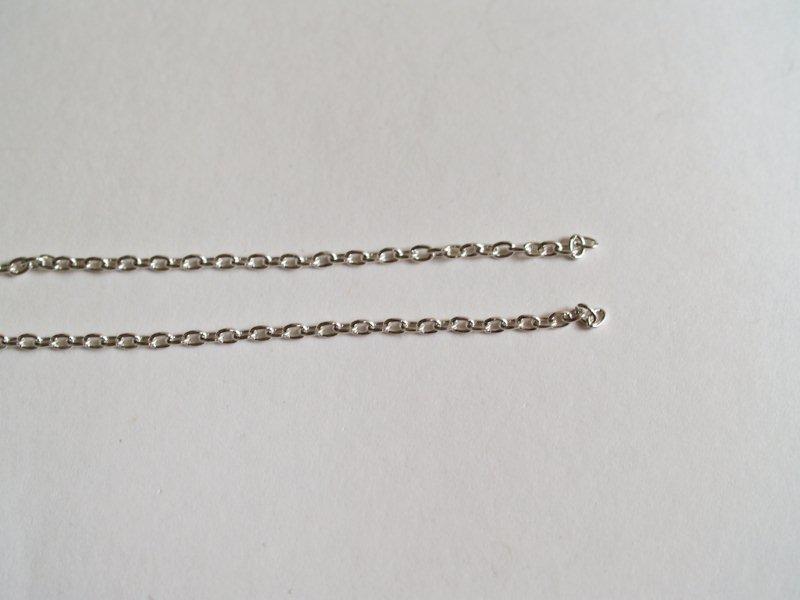
Find the center point of your necklace chain and using wire cutters, clip it in half.
 
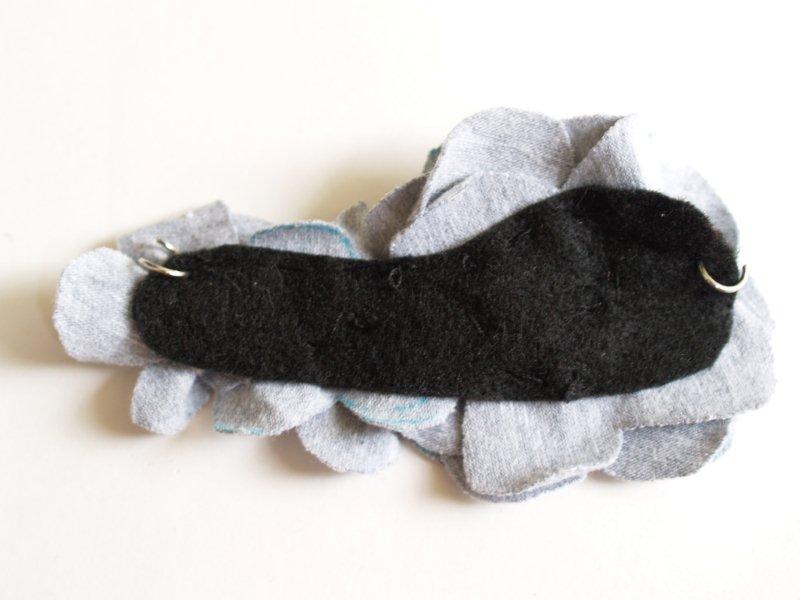
Turn your flower bib over and add an open jump ring to each side of the felt. Don’t get too close to the edge.
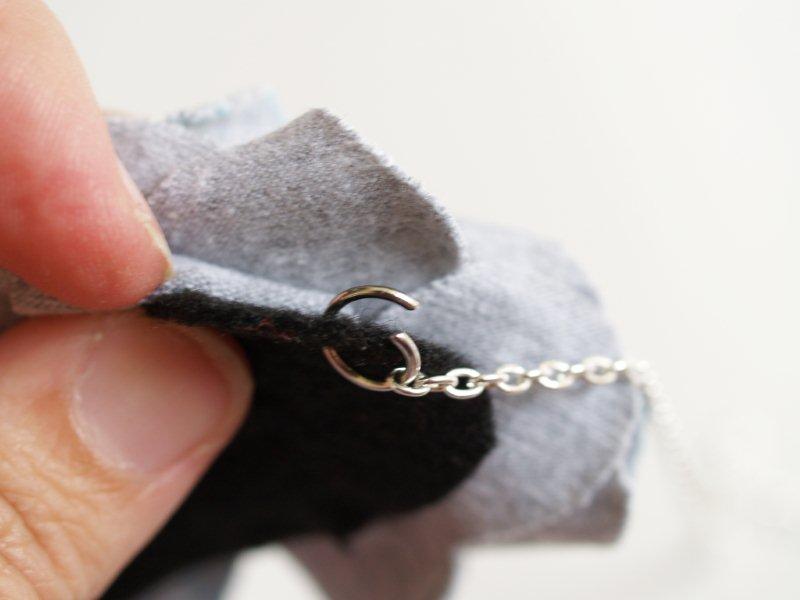
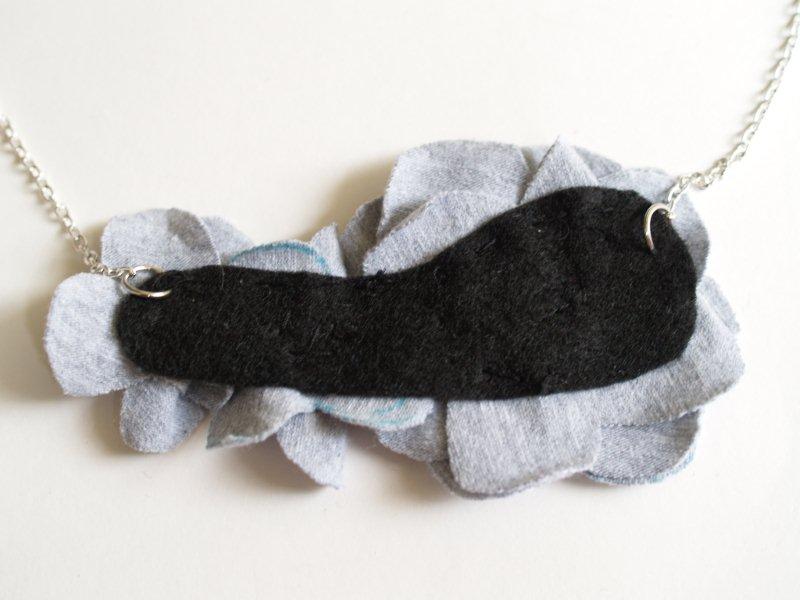
Add one end of your chain to each jump ring.
Close your rings. Your bib is now attached to the chain.
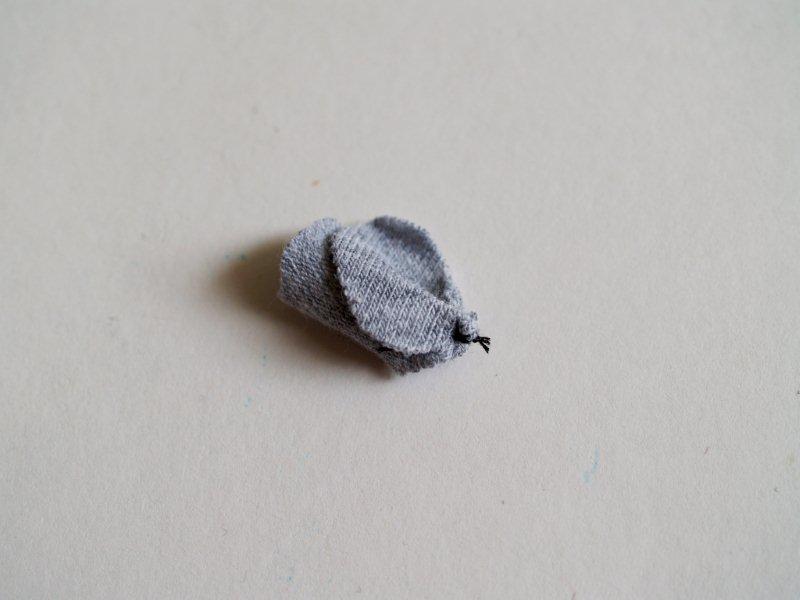
For the small decorative piece at the top, fold the 2 petal flower in half and take a few stitches to gather up the top.
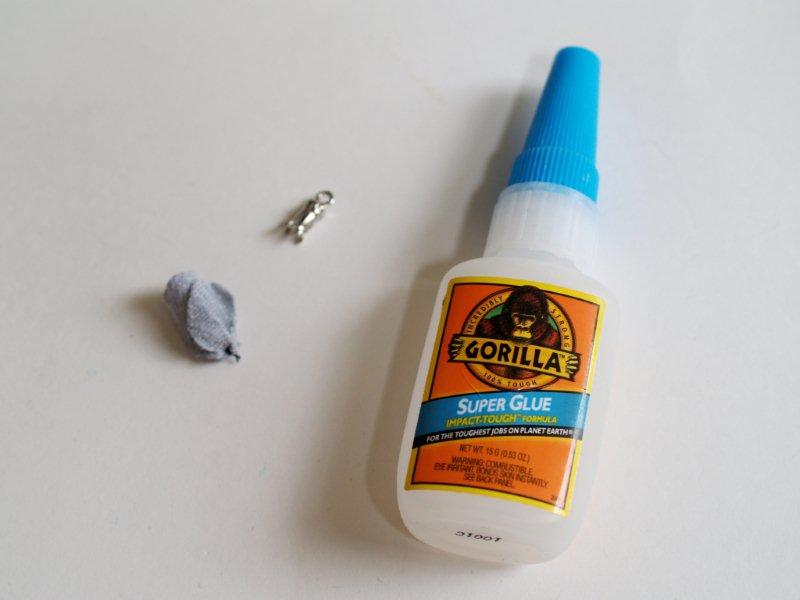
 You can skip this step but I’m paranoid, so I added just a bit of Gorilla super glue to help hold the piece in the ribbon clamp.
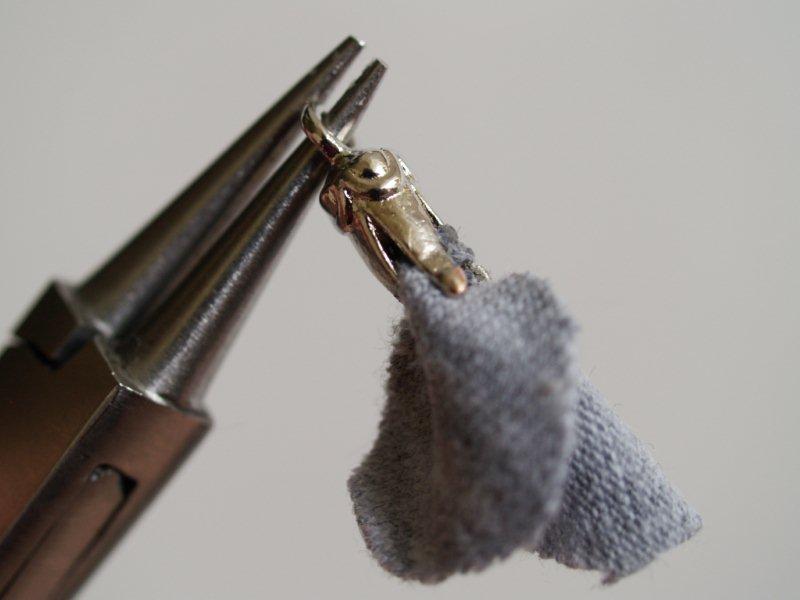
If you’re using a clamp, open up the little teeth and place the petal inside. Clamp the ends around the fabric. You can also use a small cone to glue the petals into.
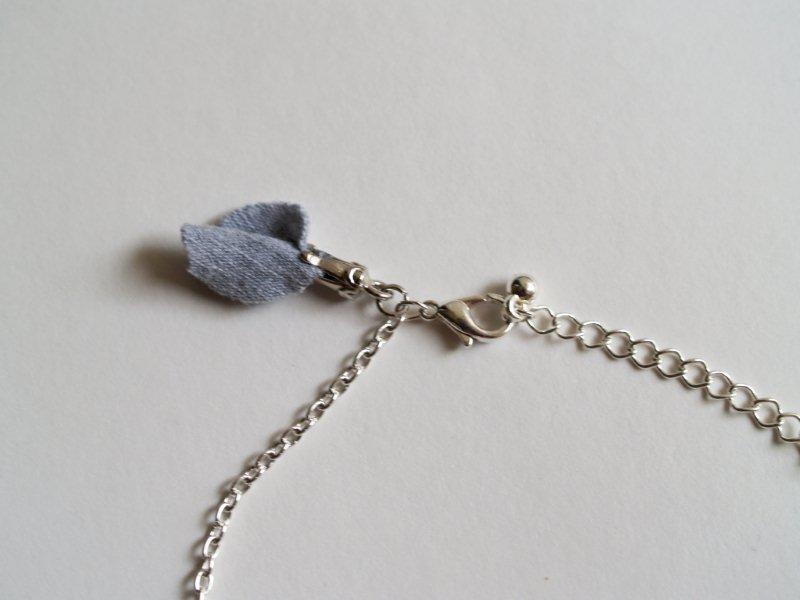
 Add a small jump ring to the loop on the clamp, then add this to the necklace chain near the clasp.
 That’s it! So fun and cute, don’t you think? I think I need this in multiple colors.
 And more from our Anthro Photo Shoot:
See you tomorrow!
Oh – want a hint? Think Chains. Lots of Chains. :)